Aliexpress経由で購入した素材で遊びました。
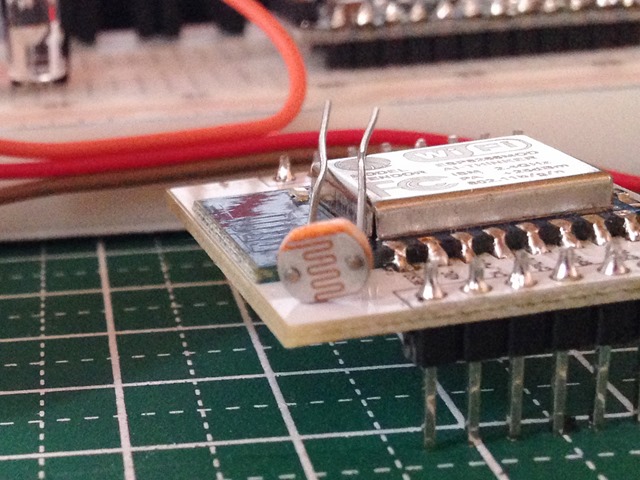
20個で、98円のGL5528光センサーをつけてみました。

20個で98円ということは、1個あたり約5円ですね。

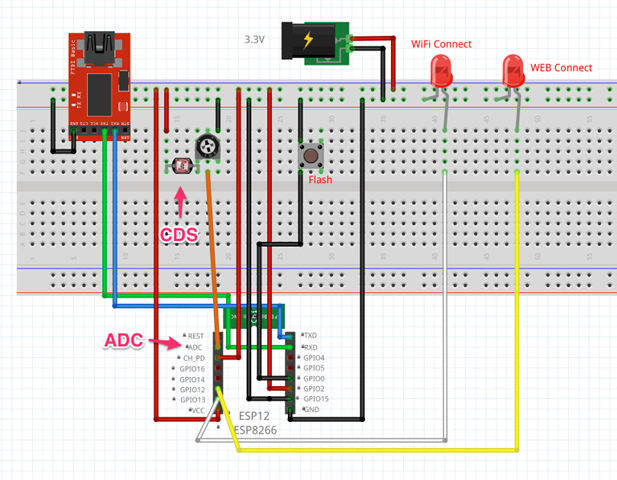
ADC にこんな感じでつけてみました。
当初ADC Pinにつけても値が拾えず、抵抗値を可変で調整したらうまく値が取れました。このADC-GND間の電圧は、強い光を当てた状態で約1.13Vくらいです。夜、電気をつけた状態で0.98Vくらい。手で覆うと0.6Vくらいになる感じです。
コードは以下のようです。エラー処理が抜けているのか、バグがあるのかわかりませんがちょっと不安定です。
/*
 ESP8266 HTTP get webclient.
 ADC Read test.
 https://thingspeak.com/channels/37124
 Arduino-compatible IDE with ESP8266
 arduino-1.6.1-macosx-java-latest-signed.zip
 https://github.com/esp8266/Arduino
 JunkHack 2015.05.09
 */

#include <ESP8266WiFi.h>

const char* ssid     = "JunkHack";
const char* password = "testtest";

const char* host = "184.106.153.149";

int WiFiConLed = 13;
int WEBconLed = 12;

void setup() {
  pinMode(WiFiConLed, OUTPUT);
  pinMode(WEBconLed, OUTPUT);
  Serial.begin(115200);
  delay(10);

  // We start by connecting to a WiFi network

  Serial.println();
  Serial.println();
  Serial.print("Connecting to ");
  Serial.println(ssid);

  WiFi.begin(ssid, password);

  while (WiFi.status() != WL_CONNECTED) {
    delay(500);
    Serial.print(".");
    digitalWrite(WiFiConLed, HIGH);
    delay(400);
    digitalWrite(WiFiConLed, LOW);
    delay(100);
  }

  Serial.println("");
  Serial.println("WiFi connected");
  Serial.println("IP address: ");
  Serial.println(WiFi.localIP());
}

int value = 0;
int count = 0;
int adc = 0;

void loop() {
  delay(5000);
  ++value;

  Serial.print("connecting to ");
  Serial.println(host);

  // Use WiFiClient class to create TCP connections
  WiFiClient client;
  const int httpPort = 80;
  if (!client.connect(host, httpPort)) {
    Serial.println("connection failed");
    return;
  }

  digitalWrite(WEBconLed, HIGH);
  delay(1000);
  count += 1;

  Serial.print("ADC: ");
  adc = analogRead(A0);
  Serial.println(adc);

  // We now create a URI for the request
  String url = "/update?key=5GPL7J7EVNB5R8GE&field1=";
  url += adc;
  Serial.print("Requesting URL: ");
  Serial.println(url);

  // This will send the request to the server
  client.print(String("GET ") + url + " HTTP/1.1\r\n" +
               "Host: " + host + "\r\n" +
               "Connection: close\r\n\r\n");
  delay(10);

  // Read all the lines of the reply from server and print them to Serial
  while(client.available()){
    String line = client.readStringUntil('\r');
    Serial.print(line);
  }

  // Close connection
  Serial.println();
  Serial.println("closing connection");
  digitalWrite(WEBconLed, LOW);
}
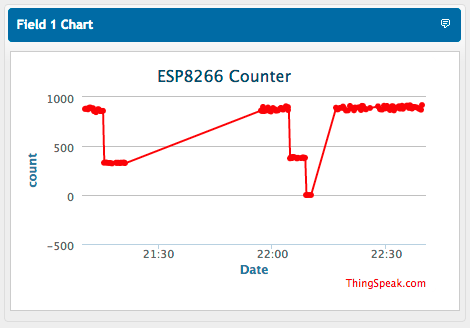
とりあえず、こんな感じで、データが投げられています。

ピンバック: 初めてのIoTデバイス完成 | junkhack